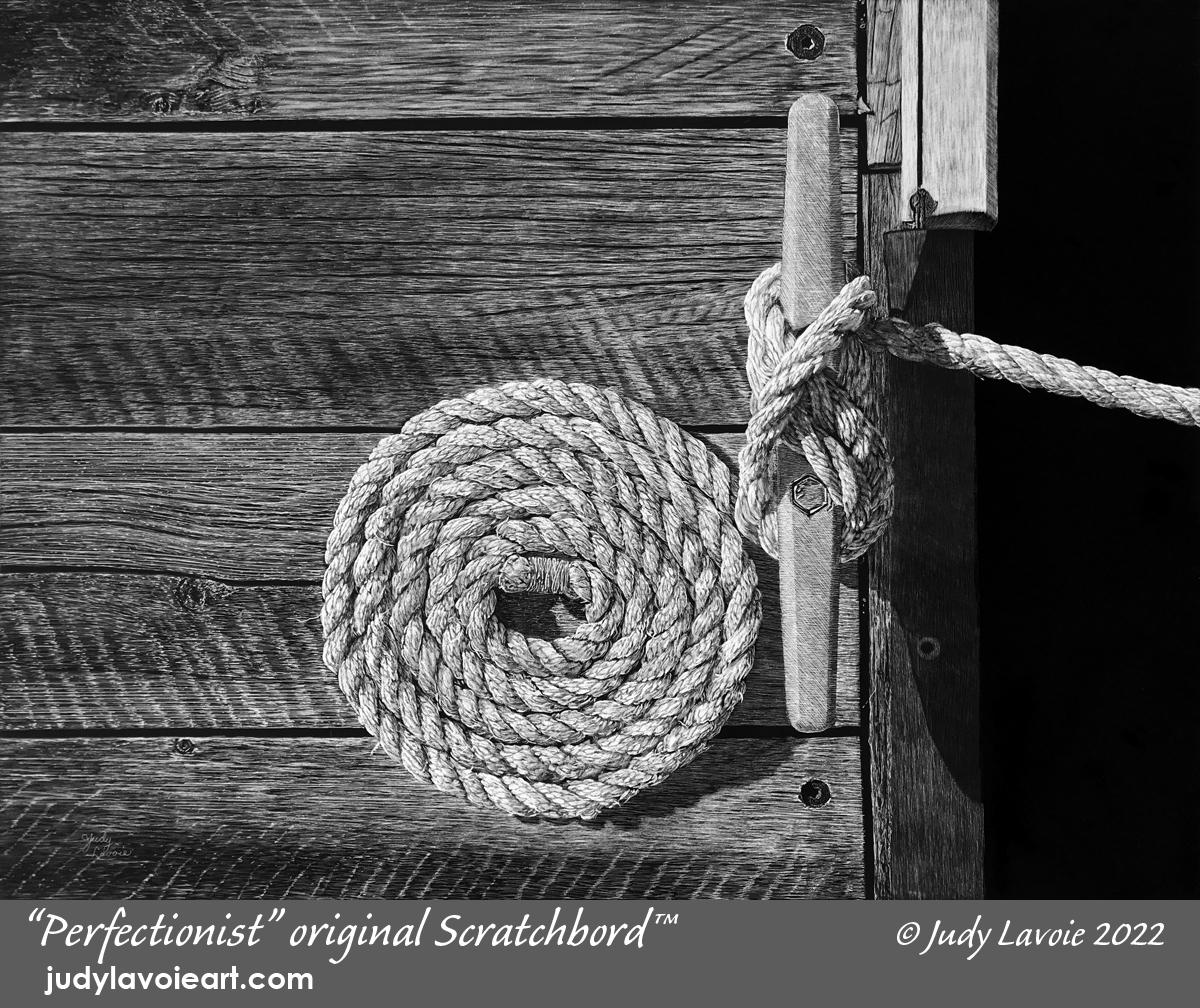
Months ago I set my sights on entering the 2022 International Society of Scratchboard Artists (ISSA) annual exhibition, which will be held in Florida this year. I’ve been exploring new techniques for scratchboard and honing my skills with what has become a favorite media. For this stiff competition, I really wanted to push the envelop, with a large and very detailed artwork. A new challenge!
THE INSPIRATION
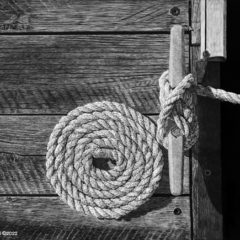
Several times this summer Rick and I have enjoyed boating with good friends who have a pontoon boat. Subject ideas for a new scratchboard project were floating around in my mind, and a marine-theme struck me as appropriate for the upcoming show. The subject picked me as I walked along the boat dock one day… a boat near our friends’ was tied down with textbook precision. The line was looped with a neat cleat hitch and the excess rope was carefully wrapped into a tidy coil. None of the other boat lines at that dock were tied up so neatly. The image struck the artist in me as one with great textures, interesting shapes, and a range of values from black to white. I quickly captured two photos from straight overhead.
THE REFERENCE
When I got a chance to look at the photos, I knew this could be a challenging subject for a scratchboard, and I was anxious to get started. In Photoshop I retouched one reference photo to to straighten it; a lopsided view would not suit my vision of perfection. The dock was built with composite boards, but I changed them in my photo to wood for three reasons: (1) I find it difficult to create a uniform solid gray in a big area of a scratchboard, (2) I love scratching wood grain, and (3) I wanted this artwork to ooze with texture. The wood I used is from a photo I took of the siding on our barn/garage, which is probably more roughly sawn than would be used for decking, but it worked for me visually. My plan was to use a 16” x 12” Scratchbord™ panel, so I used my replacement wood boards to extend the width on the left to allow for a horizontal layout. Then I cropped and resized it, retaining the solid black area on the right and focusing on the rope itself. I did not intend to use any color in my artwork, so I converted the image to black and white and printed it out.
THE PROCESS
I taped my printed image to the scratchboard and traced some guidelines using white transfer paper. I simply outlined the rope areas, not indicating any details at this stage. I also wanted to ‘mask’ off the rope and cleat so I could easily scratch away at the wood in the background, with the ability to use a light touch to scratch right up to where the rope would eventually be scratched. So, to protect the panel surface, I applied a thin clear adhesive film, a type called frisket which is sometimes used for airbrushing. With a sharp x-acto blade I cut the excess film away so it only covered the rope and the cleat. For my purposes, this film would keep those areas of the black surface unscratched and pristine. The frisket looks like grey film in Photos 1 & 2.
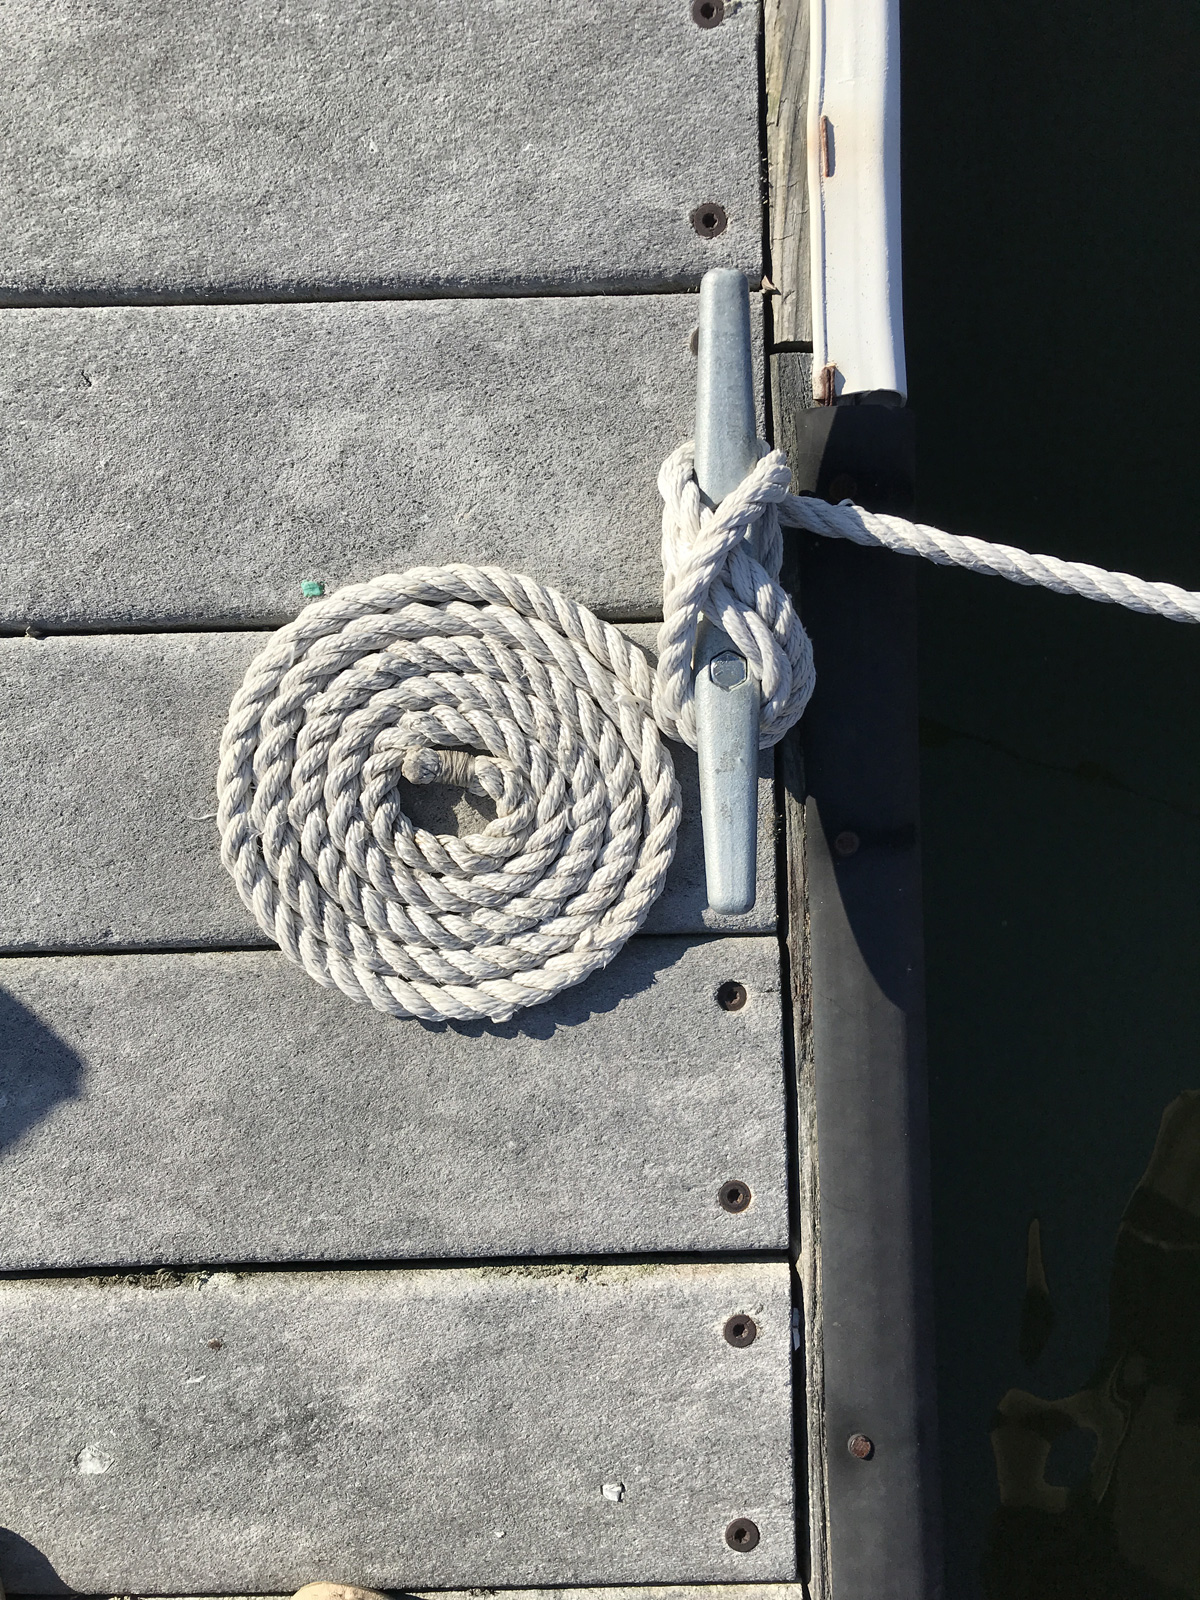
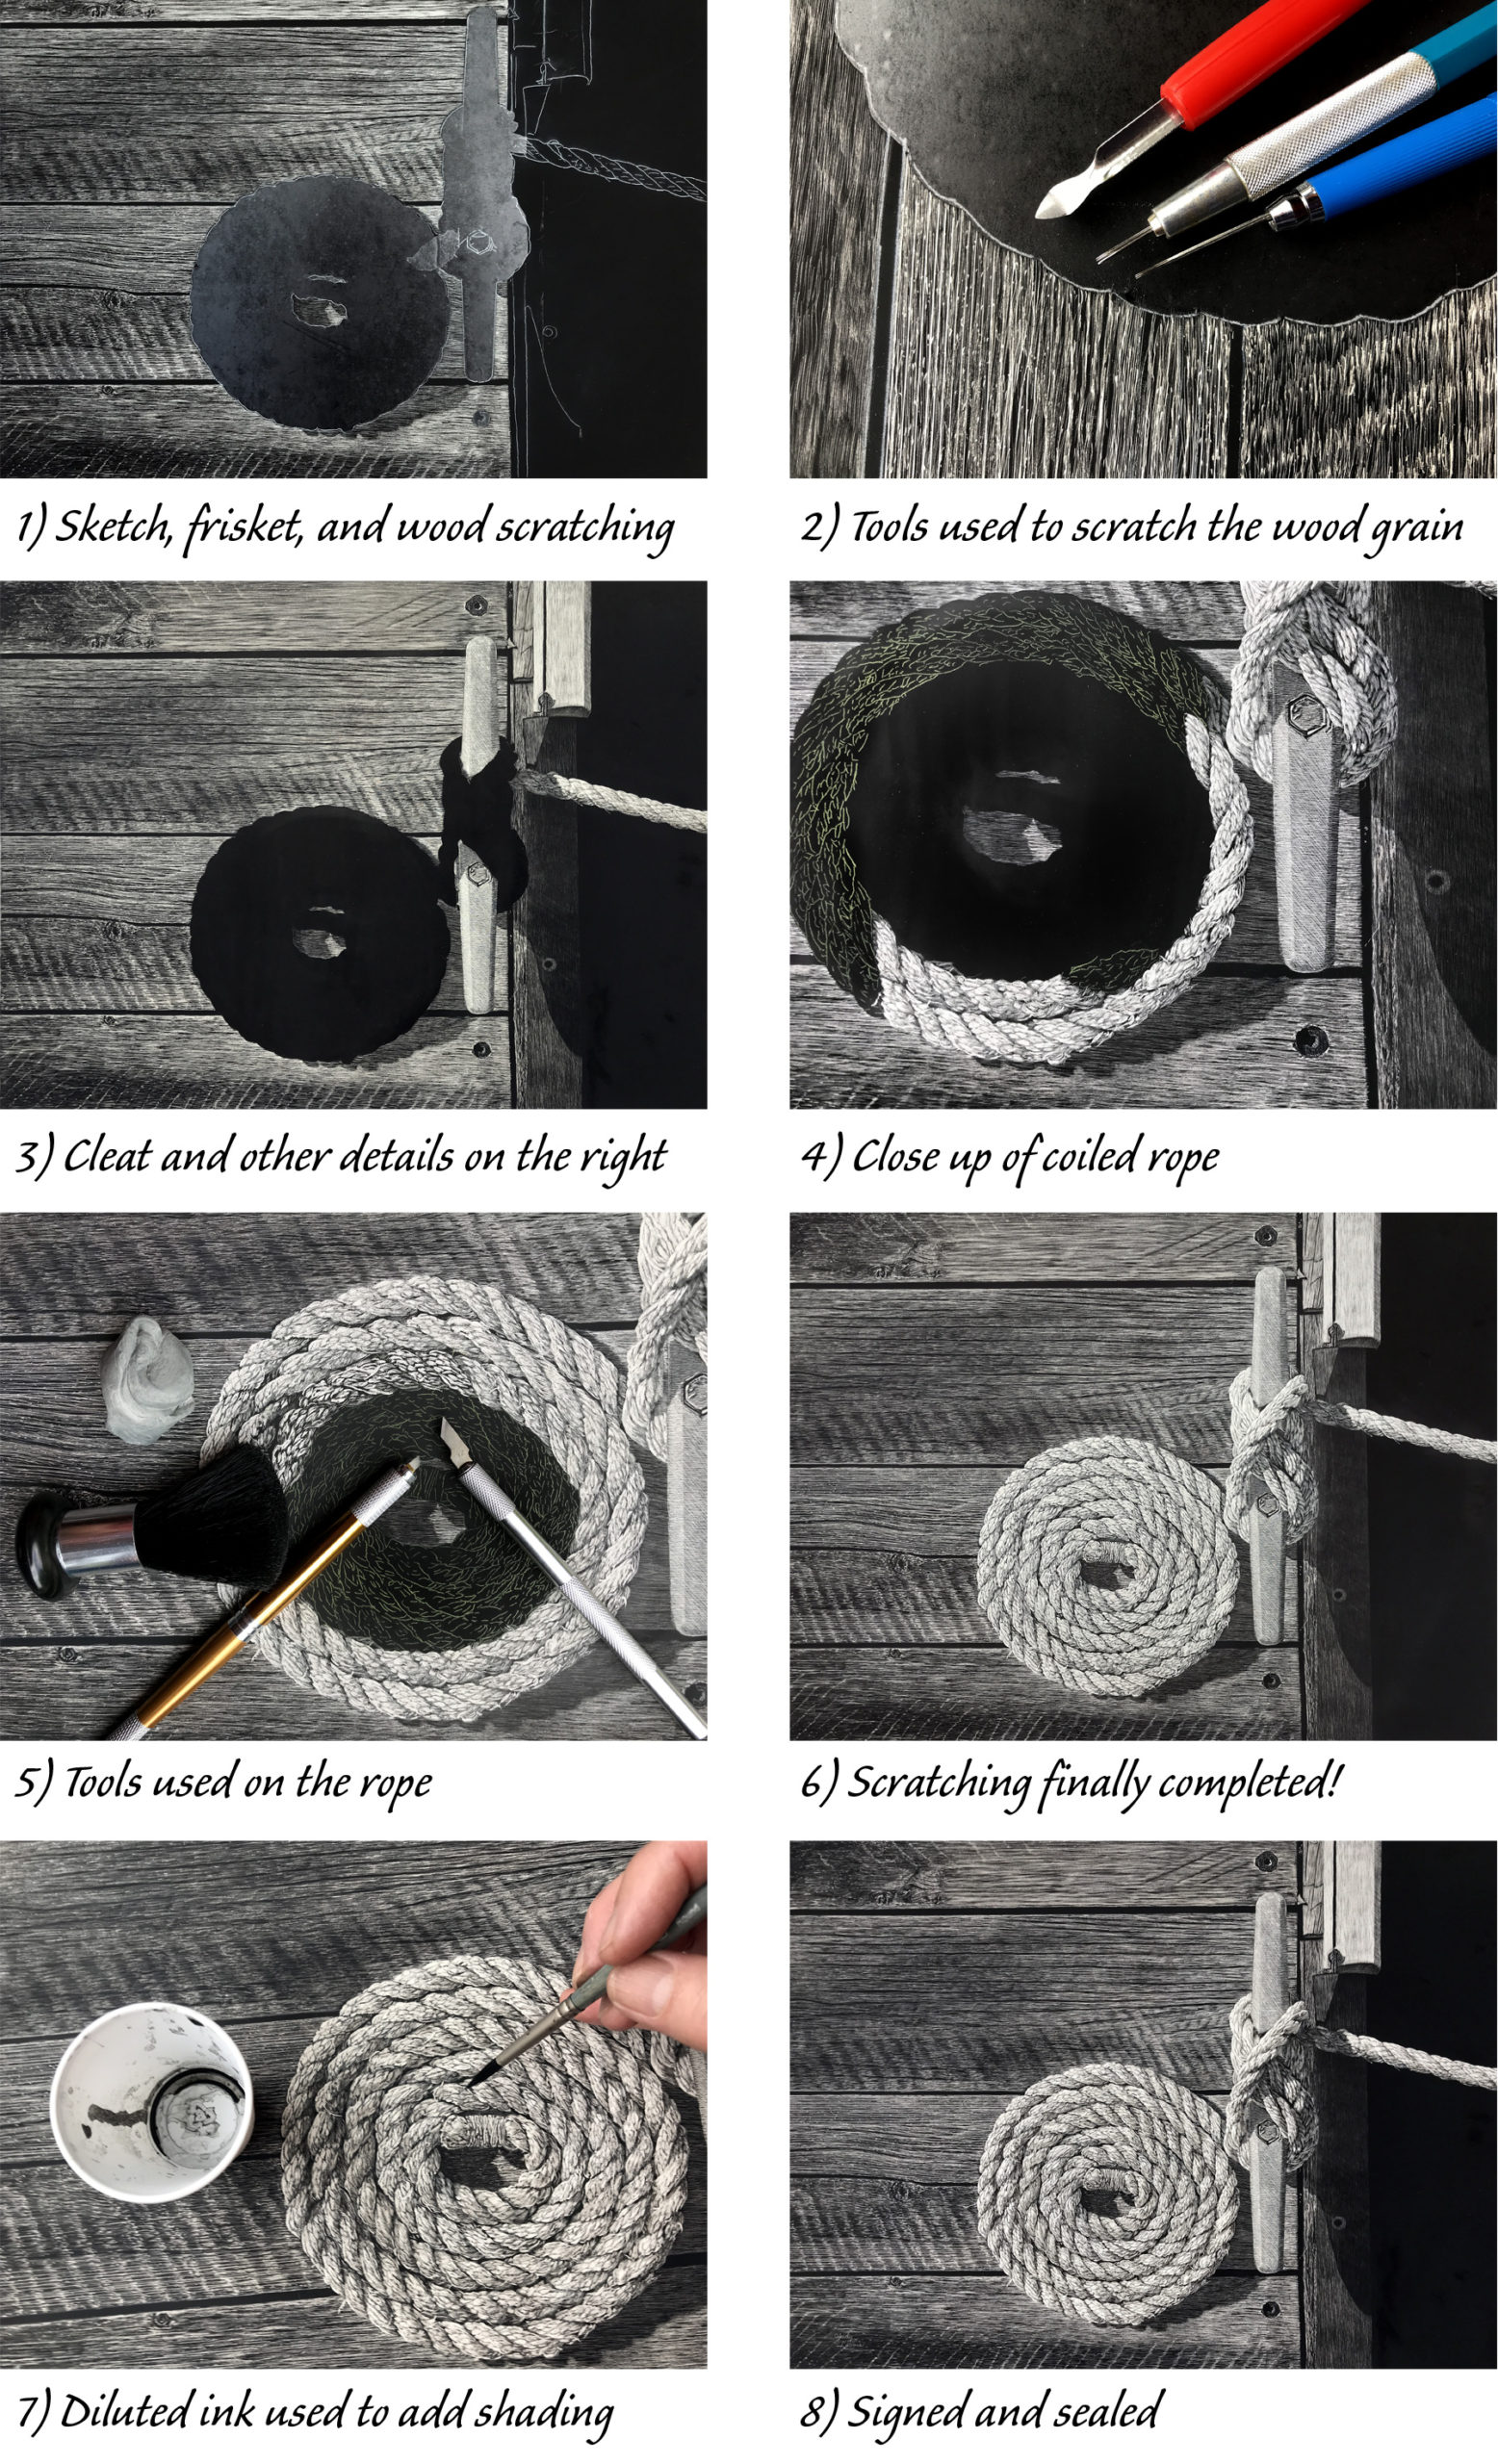
Photo 2 shows my scratching tools for the wood grain, which included two tattoo tools with different configurations of multiple fine needles and a #2 scratch knife nib, which made wider white scratch marks. The wood texture effect was created with many layers of varied scratches, made in the direction of the grain, and black left unscratched to indicate the space between the boards. One thing I love about scratching rough wood textures is that it’s hard to go wrong! I also preserved the places where there were screws fastened through the boards and added those details later.
Photo 3 shows my full board after I removed the clear film. I tackled the cleat and the hardware on the right next, working carefully to scratch in ways which would make these areas look smooth to the touch. For the metal cleat I used an x-acto blade and an ‘eyebrow’ tattoo tool, which has multiple needles lined up next to each other. I made series of close soft scratches vertically, horizontally, then diagonally, doing less on the shaded right side and more on the highlighted left side. I also used a fine fiberglass brush tool to soften the scratched lines. For the various pieces of wood on the right, my scratches were vertical, a subtle contrast to the strong horizontals of the wood background. I tried to create soft edges where the board in the lower right corner fades into the darkness. I love how hardware and imperfections add interesting little touches.
My printed image was still hinged to the panel, and I decided to test a sheet of yellow transfer paper to trace some guidelines for the twisted rope. Transfer paper is like carbon paper except it is unwaxed for art use and available in white, graphite, and colors. It can be easily erased from the scratchboard surface with a kneaded eraser. It also sometimes fades away simply from my hand rubbing on it or from the soft cloths and make-up brush I use to remove the fine black dust which is created by scratching into the india ink surface. To keep the guidelines visible I just traced sections of the rope at a time. NOTE: I liked using the yellow transfer film and will try red and blue versions soon. When I use graphite transfer paper I need good lighting to see the guidelines and when I use white it is sometimes confusing to tell which guidelines have been scratched.
The rope turned out to be a massive challenge, very detailed, complex, and slow-going. I concentrated on one small section at a time, trying to stay accurate and referring frequently to my reference photo. Like the rough wood grain, the rope texture was uneven and forgiving - I don’t think anyone would look at a section of my rope and say it looked wrong! Little by little I scratched to the center of the coil, turning my board as I scratched in the direction of the individual fibers. As a finishing touch, shown in Photo 7, I diluted some Claybord/Scratchbord black ink - also called ‘black repair’ since it matches the original Scratchbord surface used in Ampersand Art’s manufacturing process. With a small brush I applied transparent coats of light grey to places where the twists in the rope would be less highlighted and slightly shaded. This detail might be hard to detect if you compare Photo 6 with Photo 8, but it is the type of subtlety I like to inject into my artwork which can enhance the 3-dimensional illusion.
“Perfectionist” took many many hours but I am pleased with the results and glad I attempted the complex image. It’s signed, sealed and entered into the ISSA exhibition! I’ll keep you posted on my rejection or acceptance, due in late September. Watch this blog to see my second entry soon, another marine-themed scratchboard!
